
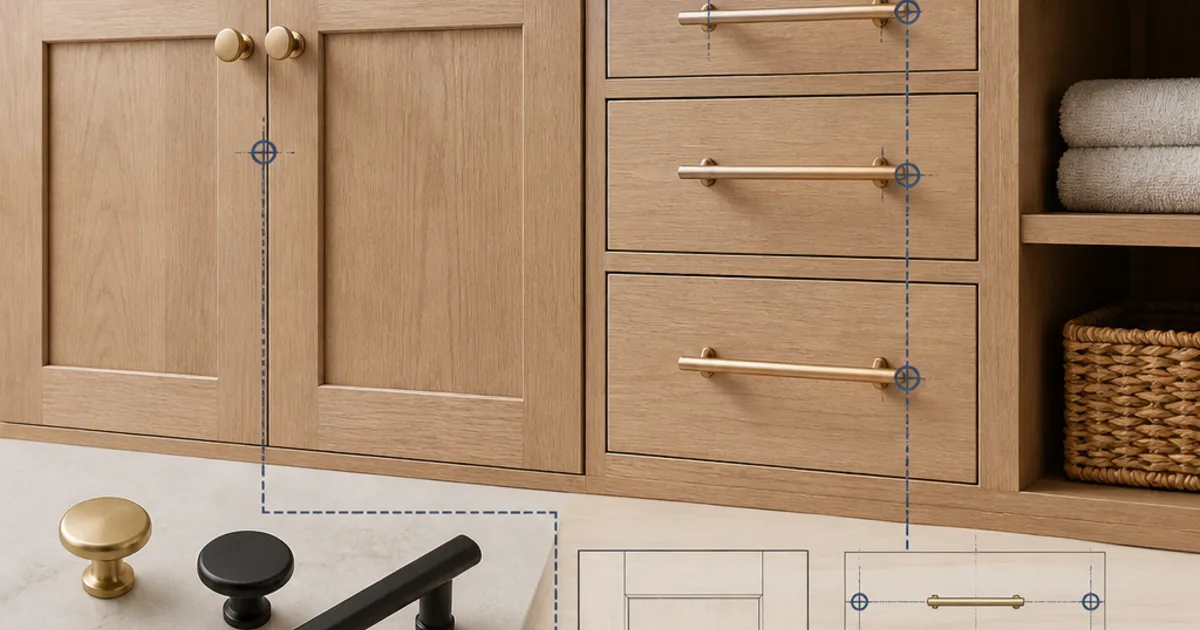
For Shaker cabinets, the safest and best-looking combination is a simple round or square knob on doors and a straight bar pull on drawers, with pull length roughly one-third the width of the drawer front. Mount door knobs on the stile opposite the hinges — near the bottom corner on uppers, near the top corner on bases — and center drawer pulls on the front, using the same reference measurement for every cabinet in the room. Shaker doors have a flat recessed panel framed by stiles and rails, so hardware reads against that frame — anything ornate fights the geometry. Settle hardware before doors are drilled: list every door and drawer front with its width, then compare Shaker door styles and stile widths in the kitchen cabinet selection so you know exactly what mounting zone you're working with. With that list in hand, you can match sizes from the table below in one sitting and order and drill once, not twice.
Quick Answer: What to Pick and Where to Mount It
- Doors: one knob, 1 to 1.25 inches, centered on the stile opposite the hinges, about 2.5 to 3 inches from the bottom corner on uppers and the top corner on bases.
- Drawers: one straight bar pull, roughly one-third the drawer width, centered horizontally; centered vertically on standard drawers, in the top third on deep ones.
- Finish: one finish family for all cabinet hardware in a room; other metals can appear on lighting or plumbing.
- Order of operations: confirm the final layout, mock up positions with tape, then drill with a jig.
The sections below explain the sizing math, the placement rules, and the exceptions that trip people up.
Knobs vs. Bar Pulls: How to Decide
There is no universal rule, but there are reliable decision criteria.
Choose knobs when:
- The cabinet is a door, especially upper cabinets you open with a pinch grip.
- You want lower cost per piece — knobs use one hole and typically cost less than long pulls.
- The kitchen leans traditional, cottage, or transitional.
- Doors are narrow and a long pull would look oversized.
Choose bar pulls when:
- The front is a drawer, particularly a wide or heavy one. Pulls distribute force across two screws, so a loaded pots-and-pans drawer glides instead of racking.
- Anyone in the household has grip or dexterity limitations — a bar pull accepts a whole hand.
- The design is modern or you want long horizontal lines across a run of base cabinets.
The common hybrid
A frequent approach in both custom and ready-to-assemble kitchens is simple: knobs on doors, bar pulls on drawers. It gives visual variety, keeps hardware cost reasonable, and puts the easier grip where the weight is. If you prefer one hardware type throughout, pulls-only reads more contemporary; knobs-only reads more traditional and can feel undersized on large drawers.
Why Stile Width Limits Knob and Backplate Size
A Shaker door is a frame-and-panel construction: two vertical stiles, two horizontal rails, and a flat center panel. Most stiles measure roughly 2 to 2.5 inches wide, though this varies by manufacturer. That narrow stile is your mounting zone, and it sets two limits:
- Backplate width. A decorative backplate wider than the stile will overhang onto the recessed panel and sit unevenly. Keep backplates narrower than your stile, or skip them.
- Knob diameter. A 1.25-inch knob centered on a 2.25-inch stile leaves a half inch of frame on each side — balanced. A 2-inch knob on the same stile looks crowded.
Shaker styling is deliberately plain, which is why shaker cabinet hardware pairs with nearly anything: modern tubular bar pulls, classic cup pulls, simple mushroom knobs, or slim square knobs. The style doesn't limit you — proportion does.
Sizing: The Math That Prevents Mistakes
Hardware is sold two ways, and confusing them is a common ordering error.
- Center-to-center (CTC) is the distance between the two screw holes. This is the dimension you drill to.
- Overall length includes the posts and end caps. This is what you see.
A "5-inch pull" may be 5 inches CTC with a 5.75-inch overall length, or 5 inches overall with a 3.75-inch CTC. Always confirm which number the listing uses before drilling.
Working sizing guidelines (rules of thumb, not standards):
- Front type: Upper doors; Suggested hardware: 1 to 1.25 in. knob, or 3–4 in. CTC pull
- Front type: Base doors; Suggested hardware: 1.25 in. knob, or 4–6 in. CTC pull
- Front type: Drawers under 18 in. wide; Suggested hardware: 3–4 in. CTC pull or single knob
- Front type: Drawers 18–30 in. wide; Suggested hardware: 5–8 in. CTC pull
- Front type: Drawers over 30 in. wide; Suggested hardware: 10–12 in. CTC pull, or two knobs/pulls
- Front type: Appliance panels; Suggested hardware: 12–18 in. appliance pull
The one-third guideline keeps things proportional: on a 30-inch drawer front, a pull in the 10-inch range looks intentional, while a 3-inch pull looks like an afterthought.
Placement Rules: Where to Drill
Consistency is what separates a professional-looking install from a DIY one. Pick a reference rule and apply it to every cabinet in the room.
Door knobs and door pulls
- Mount on the stile opposite the hinges.
- Upper doors: place the knob near the bottom corner of the door, commonly 2.5 to 3 inches up from the bottom edge, centered on the stile width.
- Base doors: place the knob near the top corner, commonly 2.5 to 3 inches down from the top edge, centered on the stile.
- A frequent alternative: align the knob center with the inside corner where the stile meets the rail. This automatically scales with your door's frame and looks deliberate.
- Vertical door pulls follow the same logic — align the pull's lower end (uppers) or upper end (bases) with the inside frame corner.
Drawer pulls and drawer knobs
- Standard drawers (under about 8 inches tall): center the pull horizontally and vertically on the front.
- Deep drawers (over about 8–10 inches): centering can look heavy. Many installers move the pull up so it sits in the top third, often aligned with the height used on adjacent doors. Either choice works — just don't mix both in one run.
- Two-pull drawers: on very wide fronts, treat each half as its own front and center a pull in each half. Alternatively, use one long pull and confirm it clears the cabinet edges.
Special cases
- Corner and blind-corner cabinets: check that hardware clears the adjacent door or wall when opened. Bar pulls are the usual offender.
- Kitchen island seating side: if there is an overhang with stools, deep pulls can catch knees and clothing. Low-profile pulls or knobs are the safer pick there.
- Bathroom cabinets: the same rules apply, but drawers are often shorter, so step your pull lengths down one size to keep proportion.
Illustrative Example (Hypothetical)
The following is an illustrative scenario, not a customer result.
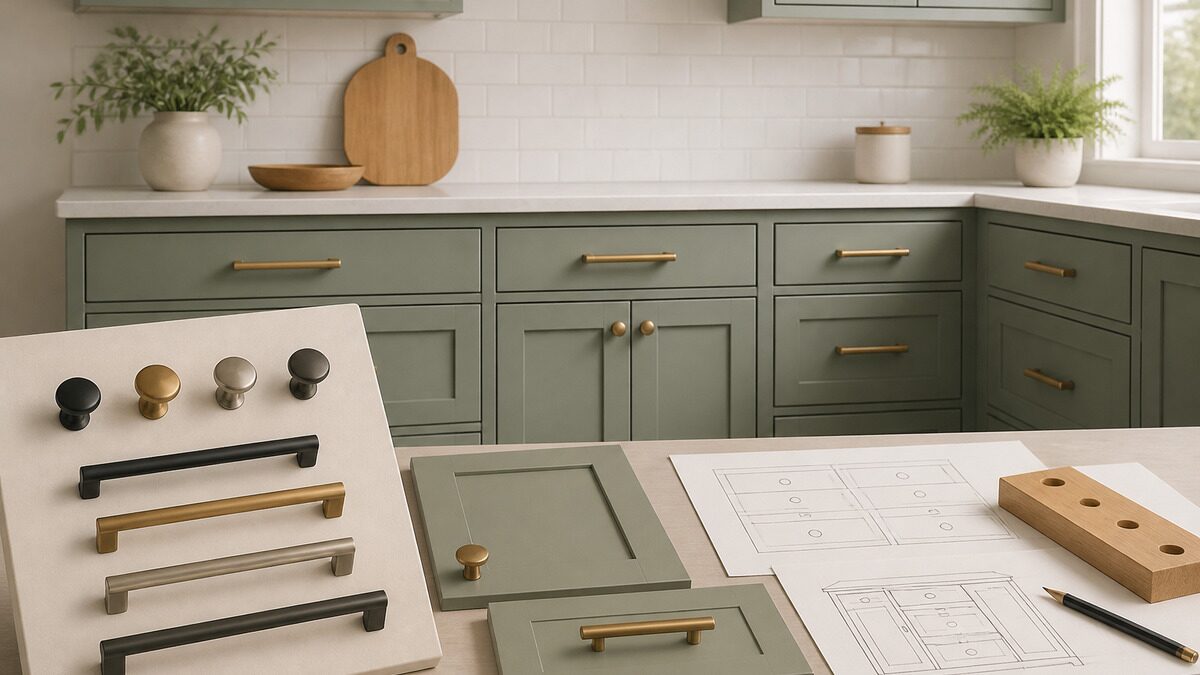
Imagine a kitchen with 24 upper doors, 10 base doors, and 14 drawers in white Shaker with a 2.25-inch stile. The homeowner selects a 1.25-inch matte black knob for all doors and matte black bar pulls for drawers: 4-inch CTC on the 15-inch spice drawers, 6-inch CTC on the 24-inch drawers, and 12-inch CTC on the two 36-inch pan drawers. All door knobs are set 2.75 inches from the corner, centered on the stile. Total hardware count: 34 knobs, 14 pulls. By standardizing on one knob and three pull sizes, the installer uses a single jig setting per category — and every piece lines up across the run.
Finish Selection and Mixing
Shaker's neutrality means finish does most of the styling work.
- Matte black: high contrast on white or light gray cabinets; shows dust and fingerprints less than polished finishes but can show oils on satin surfaces.
- Brushed/satin nickel: the most forgiving everyday finish; blends with most faucets.
- Brushed brass / champagne bronze: warm and widely offered right now. Confirm whether the finish is lacquered (stays consistent) or "living" (patinas over time). Mixing lacquered and living brass in one room will drift apart in appearance.
- Polished chrome: crisp and easy to clean, leans traditional or commercial.
Mixing metals is fine when it looks intentional: for example, one metal for cabinet hardware and a second for lighting and faucet. Keep all cabinet hardware in a single finish family within one room. If your backsplash has strong metallic veining or a warm tone, hold a hardware sample against it in the actual daylight of your kitchen before committing.
Common Mistakes to Avoid
- Drilling before final layout. Door swing, appliance panels, and drawer configurations change during a kitchen remodel. Drill last.
- Ordering the wrong screw length. Standard cabinet screws are 8-32 machine screws, typically 1 inch. Thicker doors, backplates, or thick drawer fronts need longer screws. Buy a few extra lengths.
- Skipping the mockup. Tape paper templates or painter's tape to the fronts, step back ten feet, and look at the whole wall before drilling anything.
- Hollow, lightweight pulls. Solid hardware feels better in hand and resists bending on heavy drawers. Weight in the box is a reasonable proxy for quality.
- Inconsistent measuring surfaces. Always measure from the same edge — outside edge of the door, not the panel reveal — or heights will drift across the run.
- Forgetting swing clearance. Pulls near a range, refrigerator, or wall can collide. Open everything before you call it done.
- Using a drill without a jig or backer block. A hardware jig prevents angled holes, and a scrap backer block clamped behind the front prevents blowout where the bit exits the finished face.
Conclusion
Shaker cabinets make hardware selection easier than most door styles, because the flat frame-and-panel face accepts nearly any simple shape. The work is in proportion and consistency: knobs sized to your stile width, drawer pulls at roughly one-third the front's width, and a single placement rule applied to every door and drawer in the room. Confirm center-to-center dimensions before ordering, mock up positions with tape, and drill with a jig and a backer block. If you are still choosing shaker cabinet hardware, write down each front's width and height first — that one list answers nearly every sizing and placement question before a bit touches a door.
Frequently asked questions
Should Shaker doors get knobs or pulls?
Either works, because Shaker styling is neutral. The deciding factor is usually how the doors are used: pinch-grip uppers are comfortable with knobs, while anyone with limited hand strength will prefer a pull they can hook a whole hand around. Whatever you choose, apply it to every door in the room rather than alternating by cabinet.
Can I reuse the existing holes when swapping old hardware?
Sometimes. Measure the existing center-to-center spacing first; if it matches a pull size you like, you can swap without drilling. If it doesn't, your options are a backplate narrow enough to sit within the stile and wide enough to cover the old holes, or filling the holes with wood filler and refinishing — which rarely disappears completely on a painted Shaker face. On single knob holes, a slightly larger knob base can sometimes cover a small misalignment.
Does cabinet hardware have to match the hinges?
Usually it doesn't need to, because most Shaker doors use concealed European hinges that are invisible when the door is closed. If your doors are inset with exposed barrel or butt hinges, those hinges become part of the visual hardware set, so keep them in the same finish family as the knobs and pulls.
Does hardware in an adjacent room need to match the kitchen?
No. Rooms that are visible from each other — an open kitchen and a butler's pantry, for instance — generally look best sharing one finish, because the two runs are read together. A closed laundry room, mudroom, or bathroom can take its own finish without clashing, as long as each room is internally consistent.
When should hardware be ordered during a remodel?
Choose it early and install it late. Knowing the hardware lets you check clearances, screw lengths, and backplate widths against the door design, but final drilling should wait until the layout, door swings, and drawer configuration are locked in.
Planning guidance from Homes Cabinet. Product specifications, site conditions and the agreed scope determine the right solution for your home. Illustrative examples are not project quotations or promises of a particular result.
← Explore more remodeling guides