
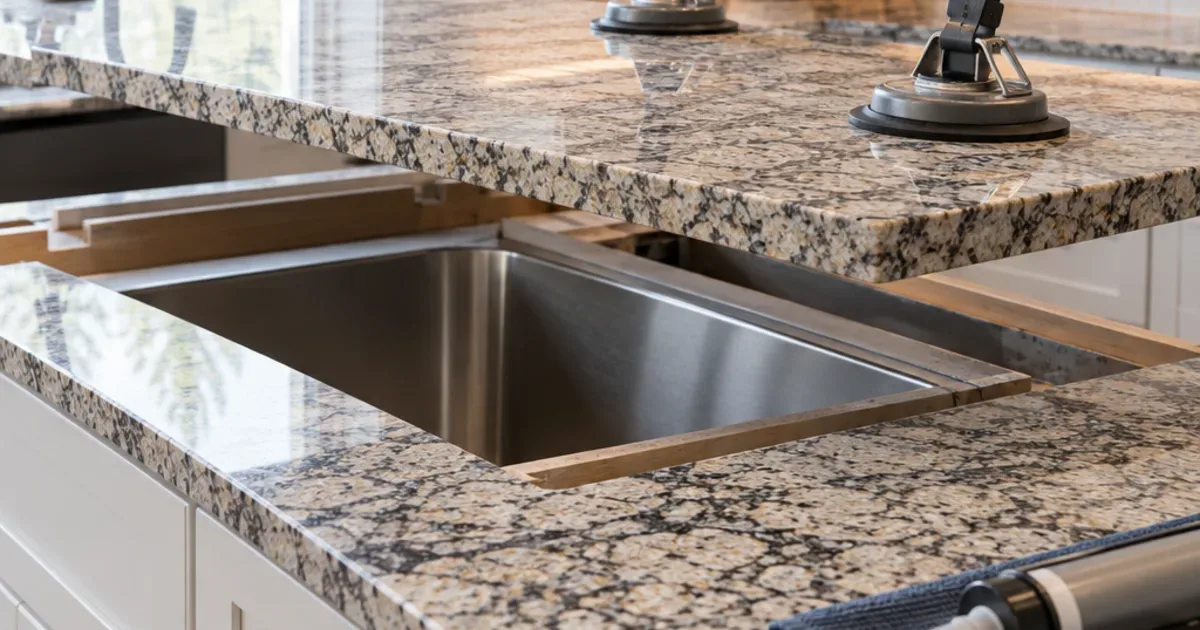
On granite countertop installation day, a crew brings your pre-cut slabs, removes any old tops, and checks that your cabinets are level. Then they set the stone, join the seams, attach the undermount sink, and clean up. Most standard kitchens are finished within a single day, although plumbing reconnection and seam curing can add time. Knowing the sequence helps you prepare your space, make decisions quickly when the crew asks, and spot problems before they become permanent. If you're still comparing providers, start by reviewing a professional countertop service. The rest of this guide covers each stage of the day.
Before the Crew Arrives: The Work That Makes Installation Day Possible
Installation day is the last step in a longer process. Before the slabs show up, a few things should already be complete:
- Template measurement: A technician measures your cabinets, often with digital or physical templates. The fabricator cuts the slabs from those measurements, so any cabinet changes after templating can cause fit problems.
- Slab selection and layout approval: Granite is a natural stone, so patterns and veining differ from slab to slab. Many homeowners decide ahead of time where seams will go and which part of the slab will sit in the most visible spots.
- Sink, faucet, and cooktop decisions: The fabricator needs the exact models to cut openings correctly. Have the sink on site, or confirm that the installer is supplying it.
Common mistake: Swapping your faucet or sink model after templating. A faucet that needs three holes won't fit a slab drilled for one, and holes generally can't be "undrilled."
How to Prepare Your Kitchen the Night Before
Setting up the space ahead of time keeps the crew working on stone instead of moving your belongings.
- Empty the countertops completely. Remove small appliances, décor, and everything else on the surface.
- Clear the base cabinets under the sink and cooktop. Installers need room to attach brackets, apply adhesive, and reach plumbing.
- Make a clear path. Granite slabs are heavy and awkward to carry. Move furniture, rugs, and fragile items away from the route between the entry door and the kitchen.
- Plan for pets and kids. Cutting, grinding, and carrying heavy stone are hazards. Keep pets and children in another part of the house or out of it.
- Confirm who disconnects the plumbing. Some installers disconnect and reconnect the sink and faucet. Others expect a licensed plumber to do it. Ask in advance so the job doesn't stall partway through.
- Protect nearby surfaces. Cover electronics and open shelving in adjacent rooms. Small amounts of dust can travel even when most cutting happens at the fabrication shop.
Step-by-Step: What Happens During Installation
1. Arrival and Walk-Through
The crew lead usually walks the kitchen with you and confirms the layout, seam locations, and sink placement. This is your best chance to raise concerns, so stay available for the first half hour.
2. Old Countertop Removal (If Applicable)
If you're replacing existing tops, the crew pulls them off. This can expose surprises such as uneven cabinets, damaged cabinet tops, or a backsplash that comes off with the counter. Tile backsplashes in particular can chip during removal. Discuss beforehand whether backsplash repair is part of the scope.
3. Cabinet Leveling and Support Check
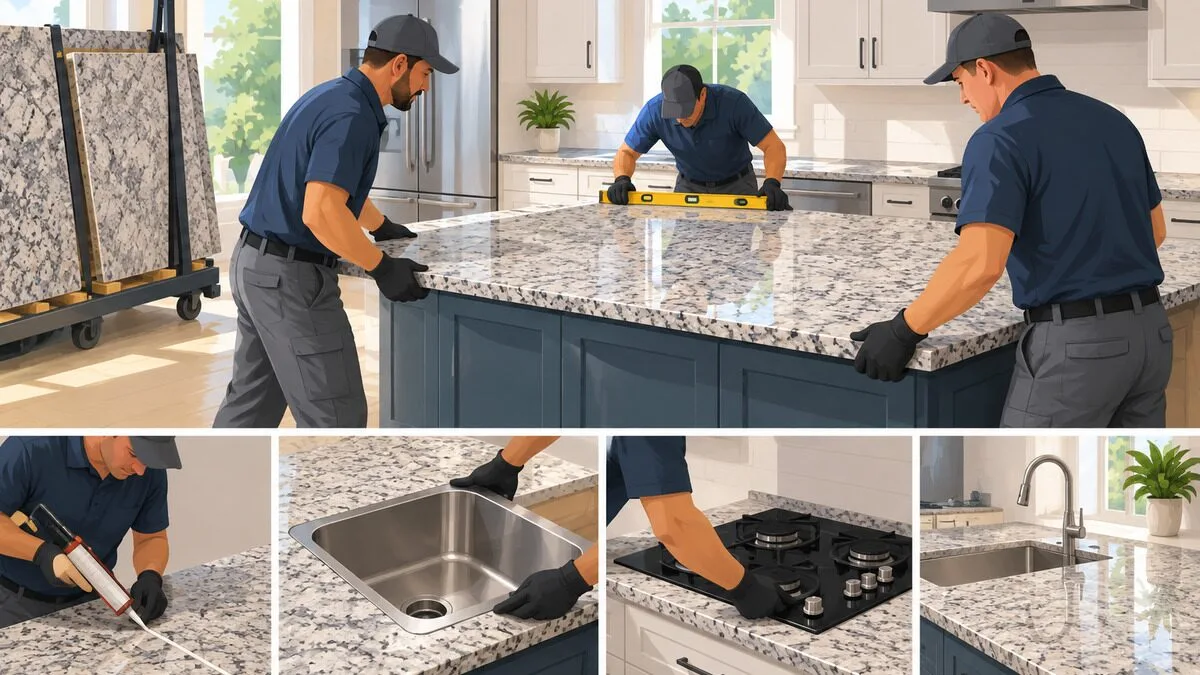
Granite needs a flat, sturdy base. Installers check the cabinets with a level and add shims where needed. Overhangs, such as island seating areas, may need brackets or corbels depending on how far they extend. Unsupported stone can crack under load.
4. Dry Fit
Slabs are set in place without adhesive to confirm fit. Small adjustments may be made on site, such as trimming an edge against an out-of-square wall. Large changes generally mean the template was off.
5. Sink Mounting
An undermount sink is typically attached to the underside of the granite with clips or brackets and sealed with silicone. This often happens before the slab is set permanently.
6. Setting the Stone and Seaming
The slabs are glued to the cabinets with adhesive. Seams are joined with color-matched epoxy, and seam-setting tools pull the pieces tight and level. A well-made seam will still be visible up close, because granite is not a single continuous surface, but it should be flush and tight.
7. Cooktop Cutout and Faucet Holes
Most openings are cut at the shop. Faucet holes are sometimes drilled on site so they line up with your fixture.
8. Cleanup and Sealing
The crew wipes down the stone and removes debris. Some granite is sealed on installation day and some is sealed later. Ask which applies to yours, and ask what sealer was used.
Illustrative Example: A Typical L-Shaped Kitchen
This is a hypothetical scenario for illustration, not a real customer result.
Imagine an L-shaped kitchen with one corner seam, an undermount sink, and an island. The crew arrives in the morning and spends the first stretch removing old laminate. They find one cabinet that sits slightly low, so they shim it. They dry-fit the two L sections, set the sink, glue down the slabs, and epoxy the corner seam. The island goes in last. In the afternoon they drill the faucet hole, clean up, and tell the homeowner to wait before reconnecting the plumbing.
The homeowner checks the seam and runs a hand along the edges. They also notice a small chip near the dishwasher, and the crew fills it with color-matched epoxy before leaving. Catching it on site avoided a return visit.
Decision Points You May Face During the Day
Even with careful planning, installers may ask you to make a quick call:
- Seam placement adjustments: Moving a seam slightly can improve how it looks, but it can also put it in a high-stress spot such as next to a sink cutout.
- Backsplash gaps: Walls are rarely perfectly straight. Decide whether a small gap will be caulked, covered by tile, or scribed.
- Overhang support: If the island overhang is generous, decide between visible corbels and hidden steel brackets. Hidden supports are cleaner looking, but they may require cabinet modification.
Tradeoff to remember: Rushing a decision to keep the day on schedule can lock in something you'll see every day for years. It's reasonable to ask for a few minutes to think.
Your End-of-Day Inspection Checklist
Before the crew leaves, walk the kitchen with the lead installer:
- Seams are flush, tight, and smooth when you run a finger across them.
- Edges have no chips, rough spots, or unfinished areas.
- The sink is centered, secure, and evenly sealed.
- Faucet holes line up with your fixture.
- The surface is level. Set a marble or a level on it to check.
- Cabinets, floors, and walls are undamaged.
- You've received care instructions and know when it's safe to use the sink and put weight on the counters.
Common mistake: Signing off without inspecting under good light. Use a flashlight held at a low angle to reveal chips and uneven seams.
After Installation: The First 24–48 Hours
Seam epoxy and sink adhesive need time to cure. Installers often recommend holding off on heavy use for a short period. Follow your installer's specific guidance, since curing times depend on the products used. Avoid putting heavy items on the counters, leaning on overhangs, or reconnecting plumbing until you're told it's safe. If your project is part of a larger remodel, coordinate backsplash tile, appliance installation, and plumbing with your kitchen remodeling atlanta georgia team so trades don't overlap or damage the new stone.
Conclusion: Prepare Early, Inspect Before They Leave
A smooth granite installation day depends mostly on what happens beforehand: accurate templates, finalized fixtures, a cleared kitchen, and clear roles for plumbing. On the day itself, stay available for decisions and don't rush the final walk-through. Respect the curing time afterward. If you're planning new countertops or a full kitchen update, a practical next step is to explore homescabinet and talk through your layout, stone choice, and scheduling before templating begins.
Frequently asked questions
Do I need to be home during granite installation?
Ideally, yes, at least for the opening walk-through and the final inspection. Installers may need your decisions on seams, gaps, or fixture placement. Being there at the end lets you catch problems while the crew can still fix them.
Can I use my kitchen sink the same day?
Usually not right away. Sink adhesive and silicone need time to cure before they hold weight and water reliably. Ask your installer for the recommended wait for the products they used.
What if my cabinets aren't level?
Installers typically correct minor unevenness with shims. Larger problems, such as damaged or sagging cabinets, may need repair before the stone can be set safely. Raising concerns about cabinet condition before templating helps avoid delays.
Will granite installation create a lot of dust?
Most cutting happens at the fabrication shop, so on-site dust is usually limited. Drilling faucet holes or small trims can still create some. Covering nearby items and closing doors to other rooms helps contain it.
Planning guidance from Homes Cabinet. Product specifications, site conditions and the agreed scope determine the right solution for your home. Illustrative examples are not project quotations or promises of a particular result.
← Explore more remodeling guides